Showing posts with label free pattern. Show all posts

Thursday, June 23, 2011

I Love When My Work Is Appreciated!

In fact, it makes me so giddy with happiness that I'm going to share my good mood with you!

This morning, I woke up to a text message with this photo:
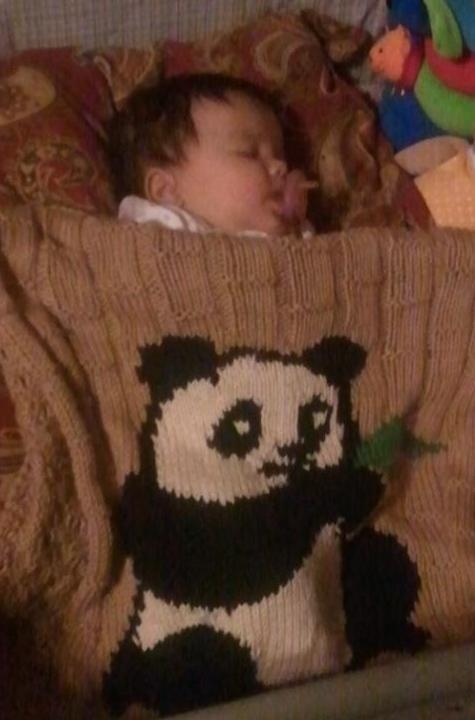

That's the daughter of one of my most favorite college friends. And she's sleeping peacefully under the afghan I made for her. Precious, right? Well ... that blanket just happens to be one of my own designs. It turns out that I get to feeling generous when I'm giddy.

So here's the deal - I'll send a free copy of the Among the Bamboo pattern to anyone who comments on the blog before Saturday midnight. (That's June 25th, Pacific Time, as date stamped by Blogger.) I think it's easiest to gift it to you on Ravelry, so please include your Rav username. If you're not on Rav (why aren't you? You should be!) or don't want to have access to the pattern via your Rav library, then make a note in the comments that you've added your name to the mailing list (up there, in the right hand corner). Then I'll send you a pdf of the pattern ... fair warning, it's a big one, what with all the charts!

And, actually, for everyone who joins the mailing list, I'll even throw in a special surprise bonus.

And, in case you're one of those who thinks intarsia just isn't for you, this pattern is a two-for-one. Check it out! You get instructions for both versions - written for the solid color, and charts for solid and instarsia options.


And honestly, the solid color option is super super easy - made for a beginner. Just knits and purls, with a few yarn overs and knit 2 togethers. If you can count, you can make this blanket!

Of course, if you love this and want to support my design work, don't forget to check out the coordinating bibs, available via Knit Picks IDP.

Sunday, June 12, 2011

Free Pattern: Nook Cozy

 About seven months ago, I took a new job in an office downtown. Driving downtown is a pain, parking costs are painful, and my employer heavily subsidizes public transit fares. So it wasn't a hard decision to become a bus commuter. In fact, there was no question, really. I decided, though, that I probably deserved to get myself a "welcome to my new job" gift and picked a nook - after all, I was now going to have lots more reading time.
I was a little worried about scratching the screen, so I set to work knitting up a case. Which I love. So here, I'm sharing the pattern with you. If you have a Kindle or other e-reader, we can debate the merits later ... for now, know that this pattern is easy enough to adapt to fit any size you need!

Nook Cozy, by Adrienne Enriquez

FINISHED MEASUREMENTS
6” x 8” (15.5 x 20.5cm)
MATERIALS AND NOTIONS
50gr/100 yds worsted weight yarn
(shown in Knit One Crochet Too, The Gourmet Collection, colorway Parfait Swirls)
One pair US Size 7 (4.5mm) needles
Size E (3.5mm) crochet hook
Small tab of hook-and-loop tape
Sewing needle& thread
2 decorative buttons
GAUGE
20sts and 40 rows = 4” in woven stitch
TECHNIQUES USED
Knit, purl, woven stitch (alternately called linen stitch), and single crochet

Pattern Notes: You may make your cozy bigger or smaller with a few easy modifications. To change the width, cast on fewer or more stitches but always an odd number. To alter the length, work as many repeats of Rows 1-14 as needed until your pieces is the desired size, then work Rows 11-14 once more before repeating and moving on to the Closure Tab.

Abbreviations:
sl - slip
RS - right side of work
WS - wrong side of work
wyib - with yarn in back
wyif - with yarn in front 
Woven stitch pattern:
RS: *K1, wyif sl1 as if to purl; repeat from * to last st, k1.
WS: P1, *p1, wyib sl1; repeat from *to last 2 sts, p2.                                                                    
Cast on 29 stitches.

Main Body of Cozy
Row 1-10: Work in Woven Stitch Patt, beginning with RS row.
Rows 11 and 13: Knit across.
Rows 12 and 14: Purl across.
Work Rows 1-14 four more times, then Rows 11-14 once more.

Repeat all rows within the Main Body once then proceed to Closure Tab.

Closure Tab
Row 1 (RS): Work in RS of woven stitch patt.
Row 2: P2tog, work in WS of woven stitch patt to last 2sts, p2tog.
Row 3: K2, work in RS of woven stitch patt to last 2 sts, k2.
Row 4: P2tog, p1, work in woven stitch patt to last 3 sts, p1, p2tog.
Repeat Rows 1-4.
Next Row: P2tog, work in woven stitch patt to last 2 sts, p2tog.
Bind off.

With wrong sides together, fold widthwise so that the fold line falls in the middle of the first section of 8 rows of stockinette.  Starting at the fold, single crochet through both layers across one edge.  Continue single crocheting around the flap.  When you reach the double layer again, single crochet the two layers together along the last edge.  Weave in ends and block if needed.

Block as needed.

Sew hook-and-loop tape on the inside of the flap for closure.  If desired, sew a button (or two) on the front of the flap for decoration.